User and Programmer Guide
This guide involves all the processes that can be performed by final users and programmers.
This guide is related to the version 4.4.3 of WMarket, released in September 2015.
User Guide
WMarket is a software that eases the users the process of looking for the best offering in different Stores since it aggregates them and all their offerings so users can find what they need more easily.
The user guide is divided into two parts: one related to consumers (users interested in acquiring offerings) and another one related to providers (users interested in acquiring and publishing offerings).
Consumers
Users Management
Registering and Logging In
The first step to access WMarket is to create a new user account. This process may vary depending on the authentication system selected by the WMarket admin.
If the WMarket instance you are accessing uses an external authentication system (i.e. FIWARE IdM), you are not required to create a new user account: you can use the one existing in the IdM. The first time that you access the instance, you will be redirected to the IdM where you have to introduce your credentials. Once that you have introduced your credentials, click Sign in (the button indicated by a blue arrow). If you do not have a FIWARE account yet, you can create a new one by clicking the Sign up button (the one indicated the by the green arrow).
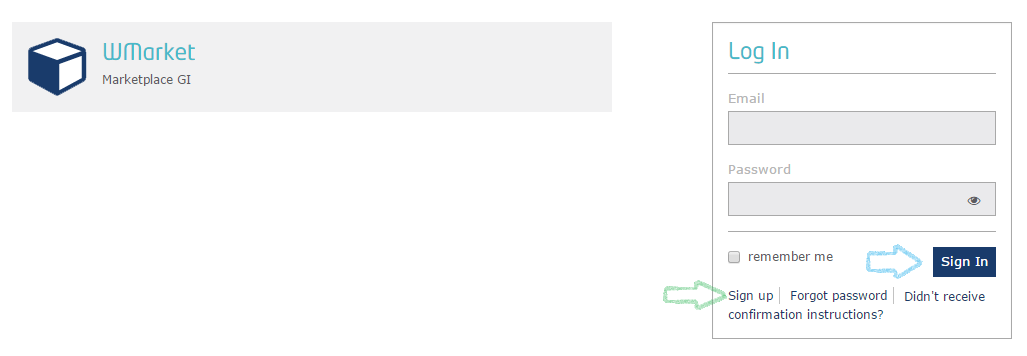
On the other hand, if you are using the local authentication system, when you access the instance and you are not logged in, a log in dialog will be displayed.

If it is your first time in this instance, you have to create a new account. To do so, just click the Sign up button (the once indicated by the green arrow). Otherwise, introduce your credentials (your email and your password) and click the Sign in button (the one indicated by the blue arrow).
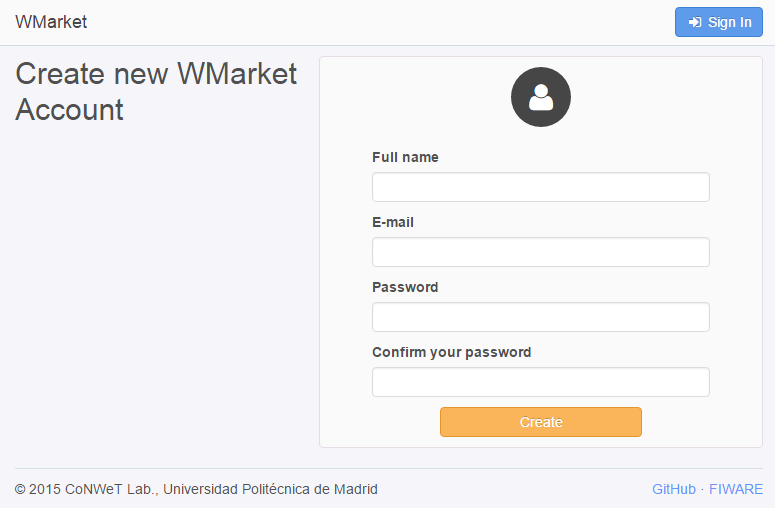
To create a new account, you will be required to introduce some details:
- Full Name: your complete full name. It must contain between 3 and 30 characters. Only letters and spaces are accepted.
- Email: your email address. It must be a valid email address according to the email pattern. Two users cannot use the same email address.
- Password: password to access your account. It must contain between 8 and
30 characters. It must contain one number, one letter and one special
character (
!,#,$,%,&and?).
Note
If the user cannot be created because one or more fields are invalid, these fields will be highlighted in red colour and a message will be attached to every invalid field so the user can understand why these fields are invalid.
Once that you have introduced these details, just click Create.
Note
When using the local authentication system, you can log in using your email or your user name. This user name is based on your full name and you can get it in the profile management page as will be explained below.
Managing User Profile
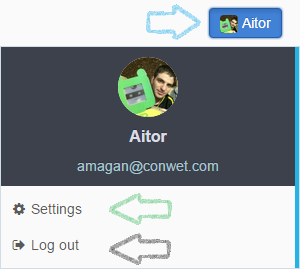
Once that you are logged in, you will be redirected to the WMarket main page where you will be able to find all the provided offerings. To manage your profile, just click in your user name on the upper right corner (the button indicated by the blue arrow) and then click the Settings button (the one indicated by the green arrow).
Note
As can be seen, you can log out by clicking Log out button (the one indicated by the black arrow).
When you click on Settings, you are redirected to the profile management page.
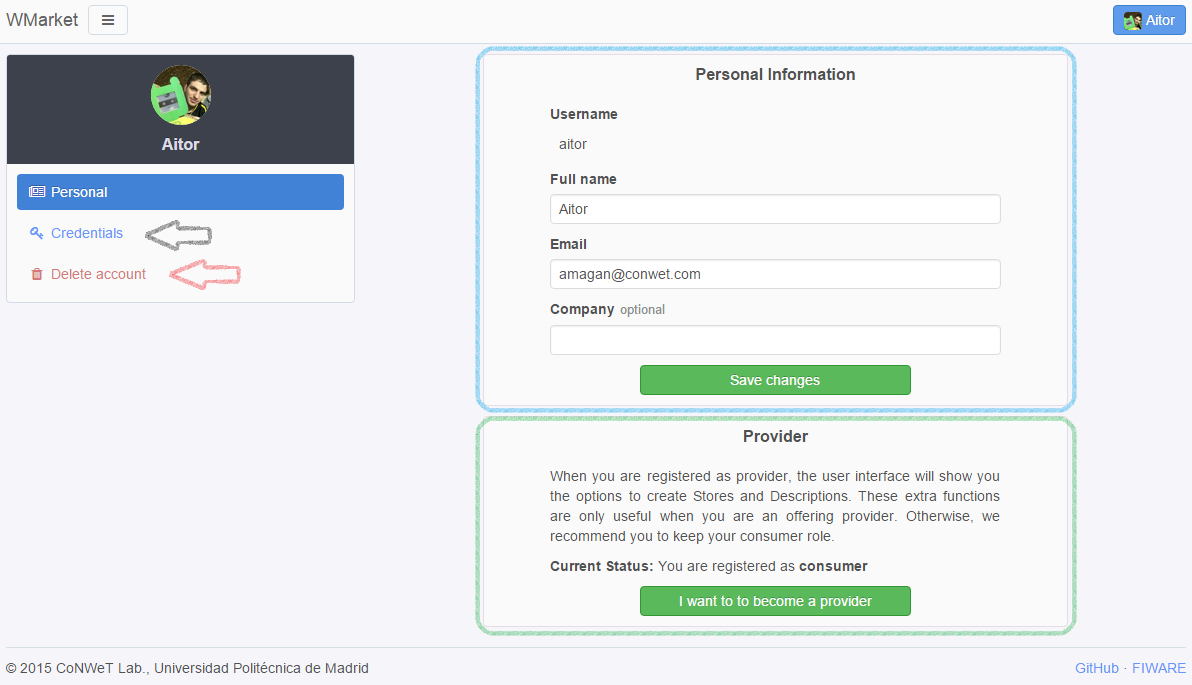
If the instance is using the local authentication system, this page will allow you to:
- Change your personal information
- Become a provider
- Change your password
- Delete your account
If you want to change your personal information, just type your new details into the Personal Information box (the one rounded with a blue rectangle) and click the Save Changes button.
Note
As can be seen, the Personal Information box contains your user name. As stated before, you can also use this user name to log in.
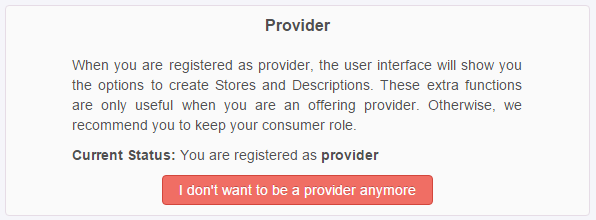
You will also be able to become a provider in order to enable new options to create stores and publish offerings. To do so, just click the I want to become a provider button located within the green box. If you are already a provider and you just want to be a simple consumer, just click the I don’t want to be a provider anymore button.
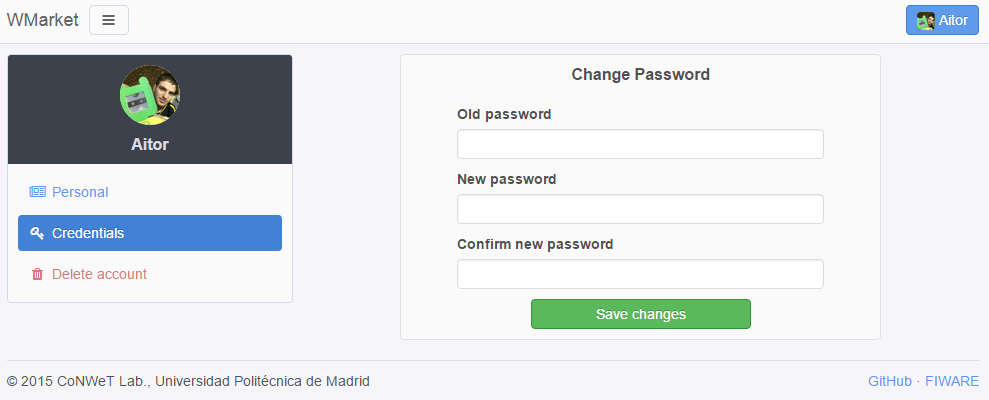
To change your password, click the Credentials button (the one indicated by the black arrow). Then, you will be redirected to a new page that will allow you to change your password. In this page, just write your old password and type twice your new password. If your old password is correct and the new password fits the password requirements, your password will be changed.
Note
When you change your password, the system will close your session so you will be required to log in again.
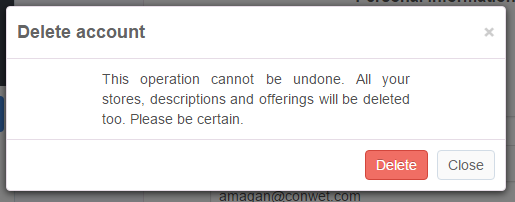
Finally, you can also deleted your account. To do so, just click the Delete account button (the one indicated by the red button). You will be required to confirm the operation as can be seen in the following image.
Note
When you delete your account, all your content (reviews, stores, offerings, descriptions...) will be deleted.
Browsing Offerings
When you access WMarket, you are redirected to the main page.
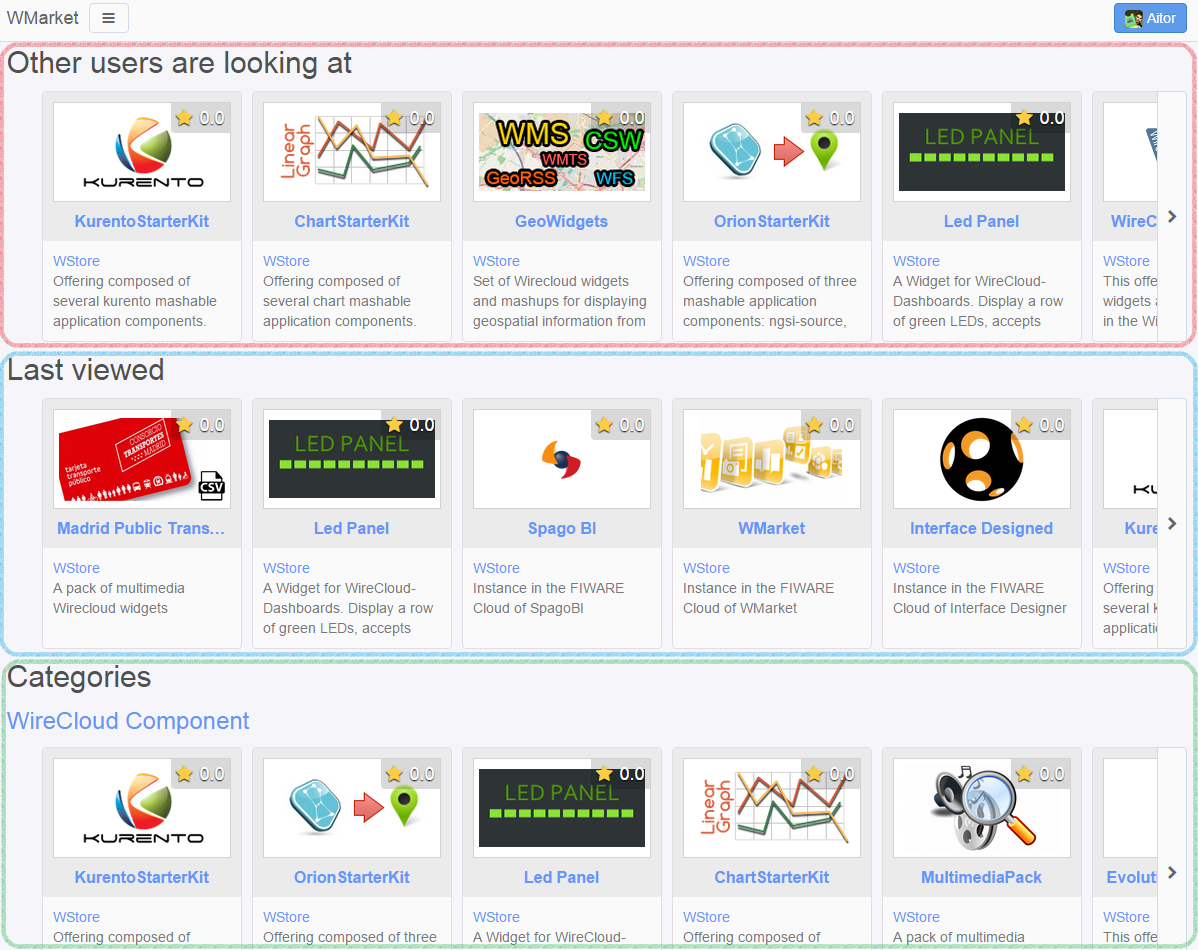
This page is divided into three parts:
- Other users are looking at (red box): shows offerings viewed by other users.
- Last viewed (blue box): shows the last offerings viewed by you.
- Categories (green box): shows offerings divided by their category. You can click the name of any category to retrieve the full list of offerings contained in this category.
Offering Details
You can click any offering to view its details.
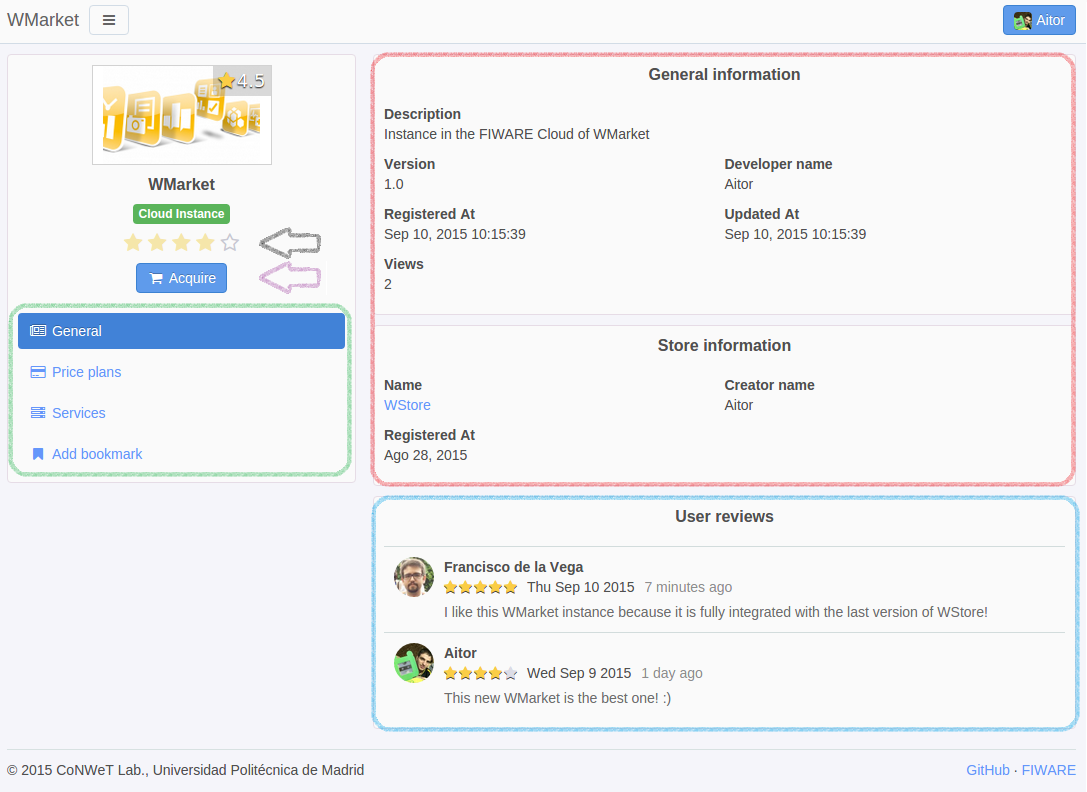
This page is divided in different zones:
- The red box contains general information about the offering: name, version, description, provider...
- The blue box contains the reviews mage by users.
- The green box contains all the actions that you can do with the offering: view its price plans, view its services or add it you to your bookmarks.
- The stars indicated by the black arrow can be used to review the offering.
- The button indicated by the purple arrow will open in a new window (or tab) the Store page where the offering can be acquired.
To view all the price plans included in an offering, just click the Price Plans button.
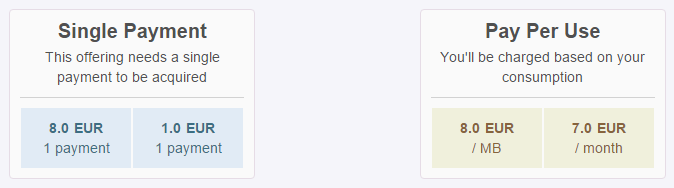
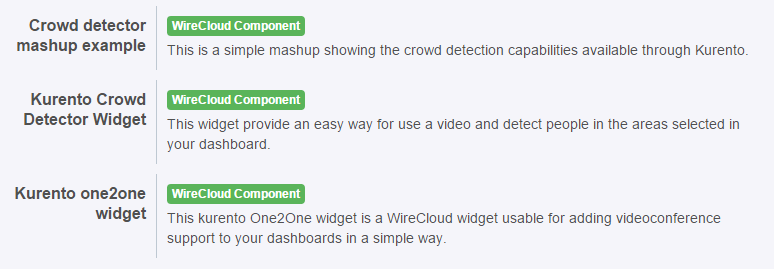
To view all the services included in an offering, just click the Services button.
Reviewing Offerings
If you want to review an offering, you can easily do it by clicking one of the stars contained in the black box. The first star means that you do not like the offering while the last one means that you really like the offering. You should click on the appropriate star according to your thoughts.
Once that you have clicked a star, a new dialog will be opened asking for an extended review as can be seen in the following picture.
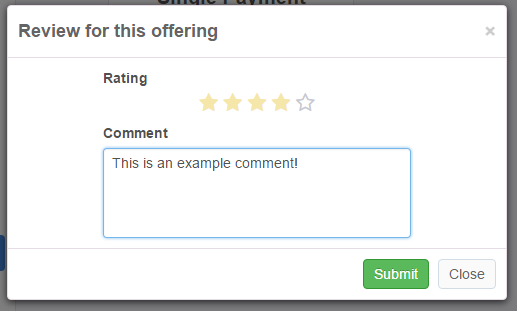
In this dialog you can change the number of stars and add a brief comment to explain your decision. When you have completed the review, just click the Submit button.
Once that you have reviewed an offering, you can edit or delete your review. To do so, just click one of the stars contained in the black box. A new dialog will be opened with your review.
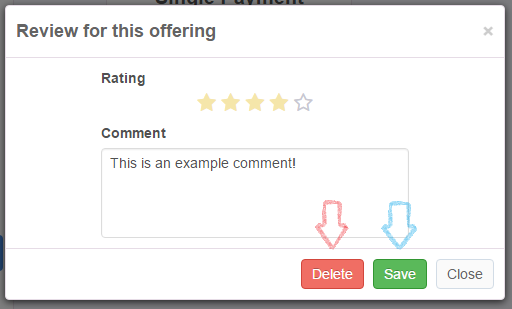
To update your previous review, just modify the number of stars and type a new comment. Then, click the Save button (the one indicated by the blue arrow). On the other hand, if you want to delete your review, just click the Delete button (the one indicated by the red arrow).
Bookmarking
To add an offering to your bookmarks, just click the Add bookmark button (contained in the green box). The button will change to Remove bookmark so you will be able remove this offering from your bookmarks.
To view the list of bookmarked offerings, you can click the menu button that is next to the WMarket text on the left upper corner as can be seen in the following image.
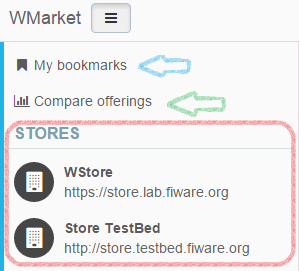
Then click the My Bookmarks button (the one indicated by the blue arrow). A screen similar to the following one will be displayed.
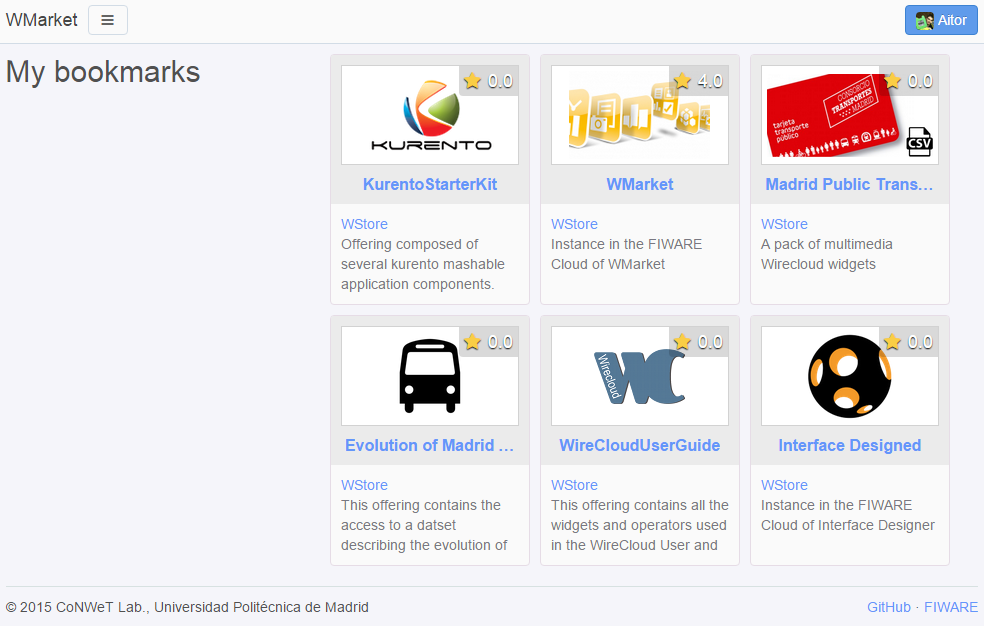
You can click any offering to obtain extended details about the offering.
Comparing Offerings
WMarket allows users to compare different offerings. To do so, click the menu button that is next to the WMarket text on the left upper corner (as can be seen in the following image) and click the Compare offerings button (the one indicated by the green arrow).
You will be redirected to a new page that will allow you to create comparisons.
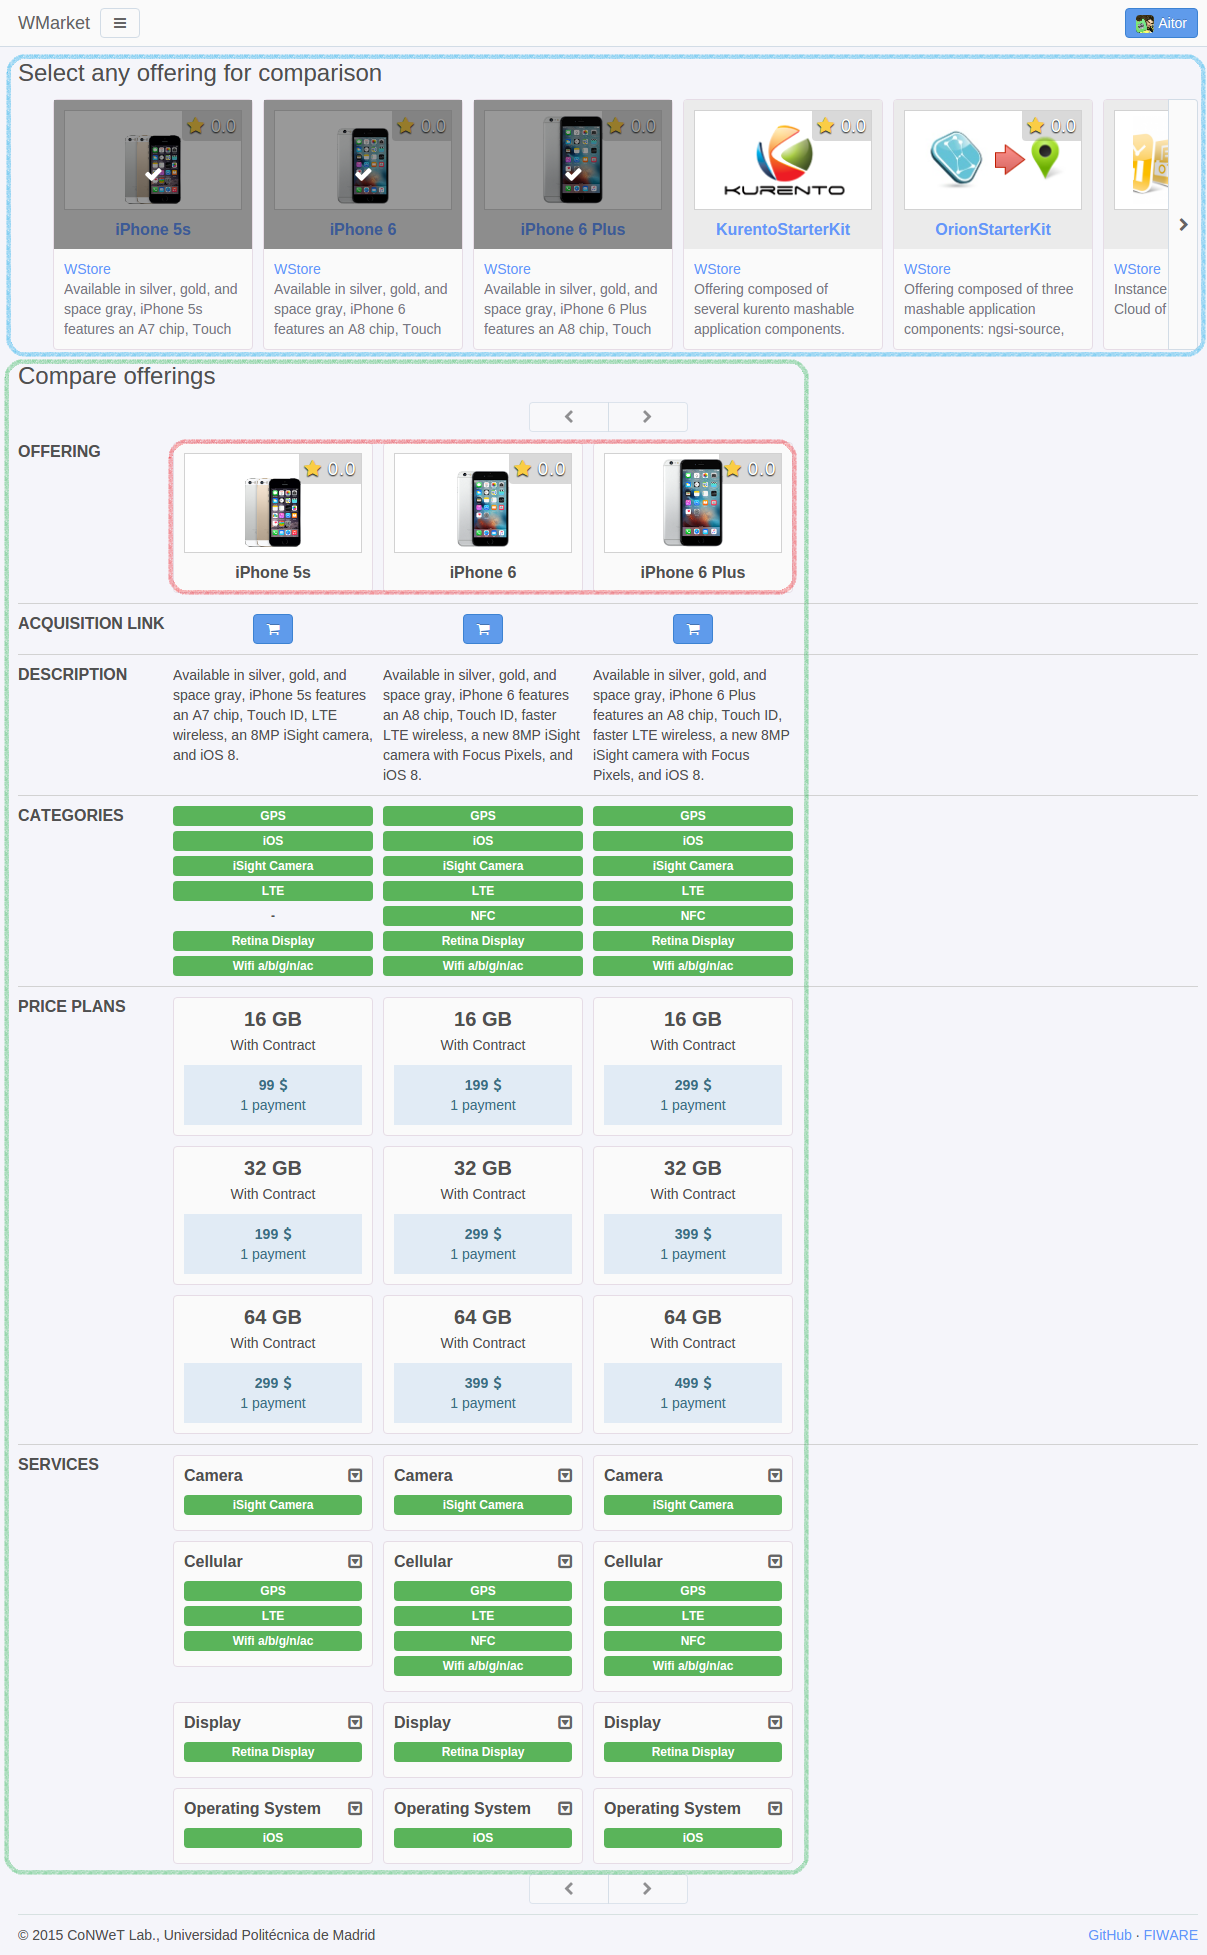
To compare offerings, just look for the offerings that you want to compare in the Select any offering for comparison section (the one rounded with a blue rectangle) and click them. Offerings will appear in the Compare Offerings section (the one rounded with a green rectangle) as you click them.
To remove any offering from the comparison, just click on its picture (the one contained in the red rectangle).
The comparison will show you:
- The name and the image of each offering.
- A link to acquire each offering.
- The description of each offering.
- The categories of each offering. Categories will be ordered and aligned in order to highlight the difference of categories between the compared offerings.
- The price plans of each offering (ordered alphabetically).
- The services of each offering. Services will be ordered and aligned in order to highlight the difference of services between the different offerings.
Browsing Stores
Apart from retrieving all the registered offerings, you can also get the offerings that are included in a certain Store. To do so, click the menu button that is next to the WMarket text on the left upper corner (as can be seen in the following image) and click on one of the registered stores.
Once that you click on one store, you will see a screen similar to the following one:
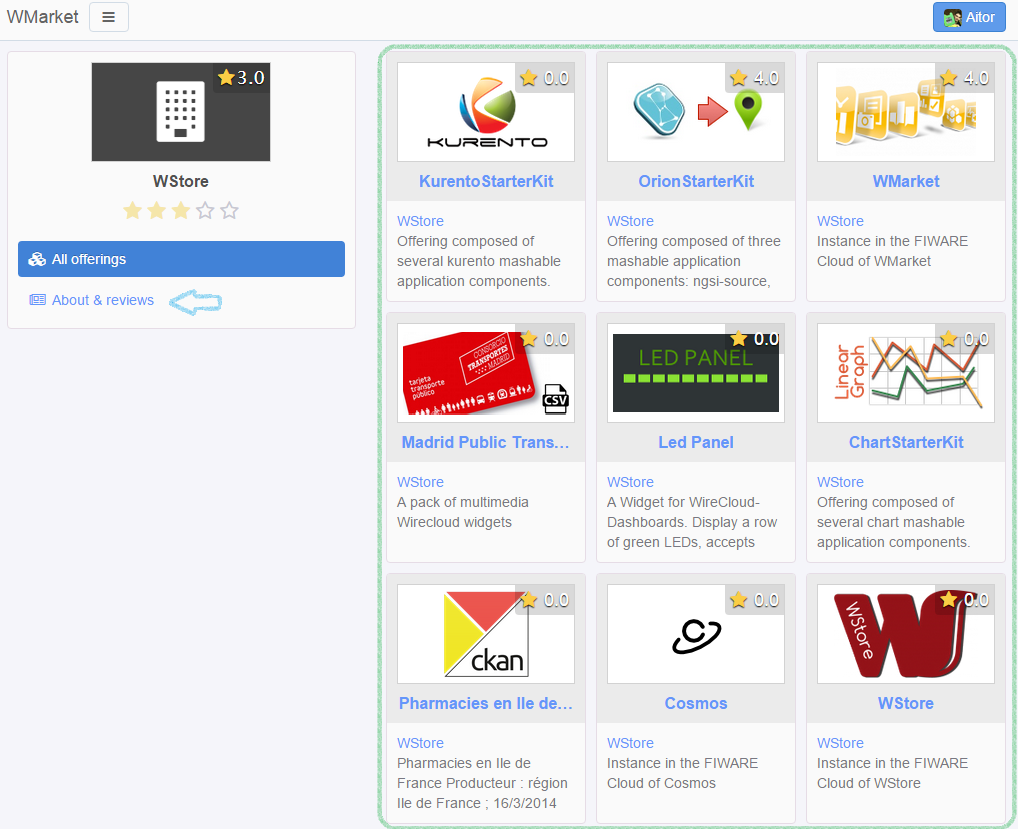
The area rounded by the green rectangle contains all the offering registered in this Store.
To retrieve the details about the Store and its review, just click the About & reviews button (the one indicated by the blue arrow). You will be redirected to the following page.
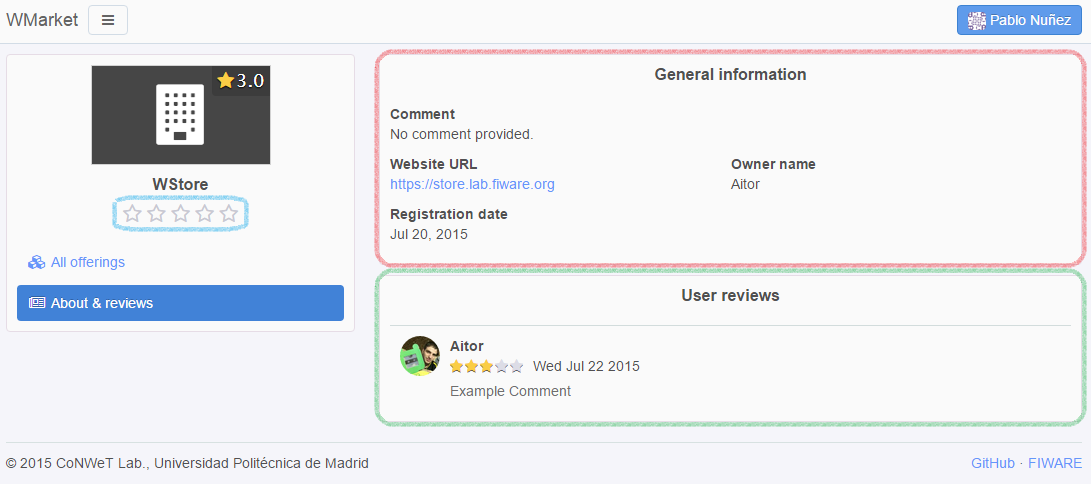
The General Information box (the one rounded with the red rectangle) contains general information about the Store (comment, web site, creator and registration date) while the Users review box (the one rounded with the blue rectangle) contains all the reviews made by users.
Reviewing Stores
If you want to review a store, you can easily do it by clicking one of the stars contained in the blue box. The first star means that you do not like the store while the last one means that you really like the store. You should click on the appropriate star according to your thoughts.
Once that you have clicked a star, a new dialog will be opened asking for an extended review as can be seen in the following picture.
In this dialog you can change the number of stars and add a brief comment to explain your decision. When you have completed the review, just click the Submit button.
Once that you have reviewed the store, you can edit or delete your review. To do so, just click one of the stars contained in the blue box. A new dialog will be opened with your review.
To update your previous review, just modify the number of stars and type a new comment. Then, click the Save button (the one indicated by the blue arrow). On the other hand, if you want to delete your review, just click the Delete button (the one indicated by the red arrow).
Providers
As explained before, providers are those users who want to create stores and upload offerings to WMarket. To become a provider, you can refer to the Administration Guide.
Stores Management
Creating Stores
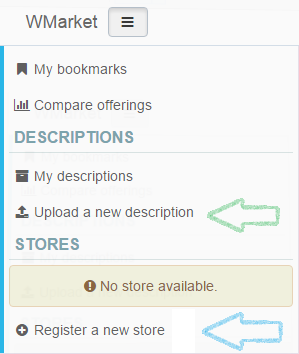
To register a new store, click in the menu button that is next to the WMarket text on the left upper corner (as can be seen in the following image) and click on the Register a new store button (the one indicated by the blue arrow).
The following screen will be opened:
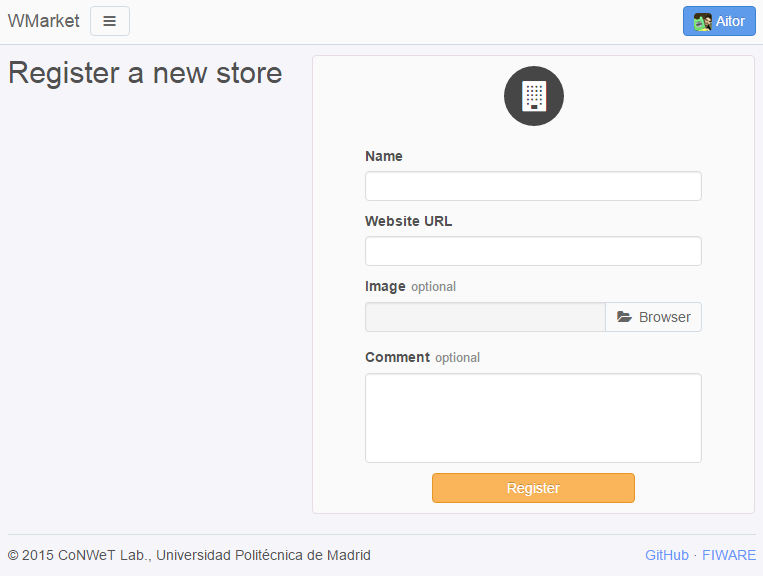
Introduce the following content:
- Name: The name of the Store. It must contain between 3 and 100 characters. Only letters, numbers, white spaces, dots and hyphens are accepted.
- Website URL: The URL where the store is hosted. The URL must be valid.
- Image: An image that will ease the process of identifying your store. You can upload it from your computer. The maximum size accepted (by default) is 3 MB.
- Comment: A brief description of your store. You can type until 200 characters.
Note
If the store cannot be created because one or more fields are invalid, these fields will be highlighted in red colour and a message will be attached to every invalid field so the user can understand why these fields are invalid.
If you have introduced these fields correctly, you will be redirected to the main page of the Store, where you will be able to manage it.

Managing Existing Stores
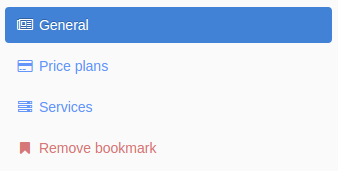
To view all the descriptions that you have uploaded to the Store, click the My descriptions button (the one indicated by a green arrow). A screen similar to the following one will be displayed:
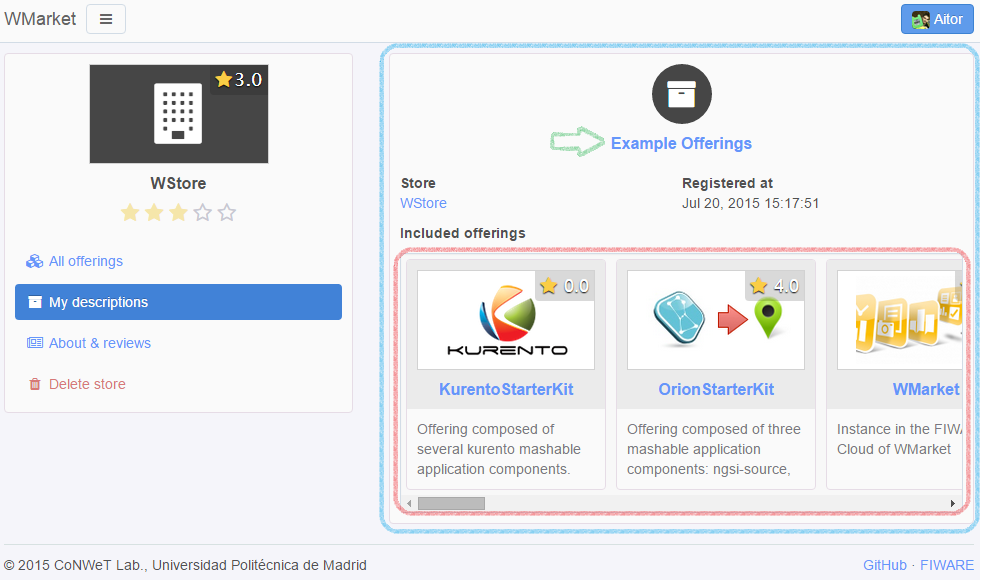
You can click on the name of the description to manage it as will be explained later.
To edit the details of your store, just click the About & reviews button (the one indicated by a blue arrow). Only store creators can edit its details. When you click this button, the following screen will be shown:
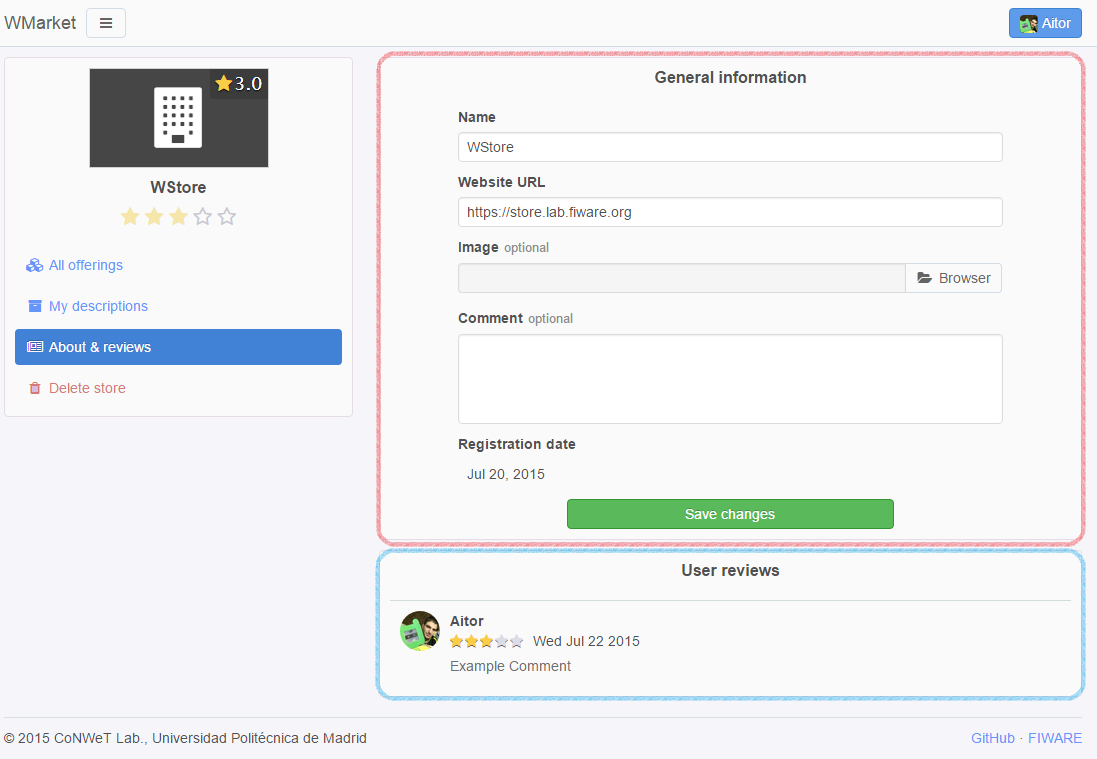
The area rounded by the red rectangle is the one that you should use to modify your store details. Introduce new details as desired and click the Save changes button when finished. The area rounded by the blue rectangle contains all the reviews that your store have received.
To delete your store, click the Delete Store button (the one indicated by the red arrow). Only the store creator can delete it. Before deleting the store, you have to confirm the operation in the following dialog:

Note
When you delete a store, all its descriptions, offerings and reviews will be deleted.
Descriptions Management
Descriptions are the definitions of your offerings. These descriptions are written in Linked USDL.
Creating Descriptions
To register a new description, click in the menu button that is next to the WMarket text on the left upper corner (as can be seen in the following image) and click on the Upload a new description button (the one indicated by the green arrow).
Once that you have clicked the button, you will be redirected to the following page:
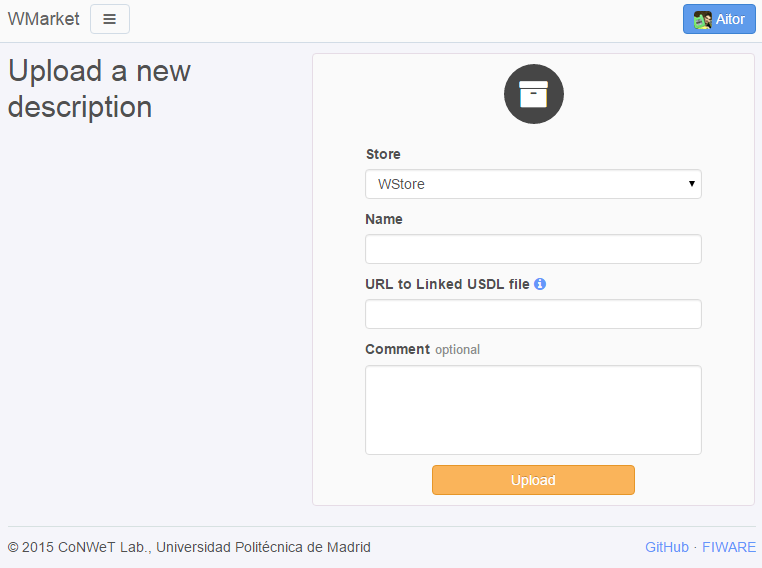
To create the description, set the following details:
- Store: The store where you want to upload the description.
- Name: The name to give to your description. It must contain between 3 and 100 characters. Only letters, numbers, white spaces, dots and hyphens are accepted.
- URL to Linked USDL file: the HTTP URL where your description is hosted. This URL must exist and contain a valid Linked USDL file. Otherwise, the description creation will fail.
- Comment: A brief comment about the description you are uploading. You can type until 200 characters.
Note
If the description cannot be created because one or more fields are invalid, these fields will be highlighted in red colour and a message will be attached to every invalid field so the user can understand why these fields are invalid.
Once that you have completed the form, the description will be created and all the contained offerings will be loaded into the corresponding store and you will be redirected to the page that contains all the offerings of this store.
Managing Existing Descriptions
To manage all the descriptions that you have upload to this store, you can click the My Descriptions button (the one indicated by a green label). A screen similar to the following one will be shown:
For each description a box similar to the blue one will appear. As you can see, the red box contains all the offerings attached to this description. To manage the description click on its name (the button indicated by the green arrow).
Note
If you have uploaded a description but you do not remember the Store that you have used to publish the offerings, you can view all the uploaded descriptions by opening the menu and clicking the My Descriptions button.
When you click on the name, you will see a page similar to the following one:
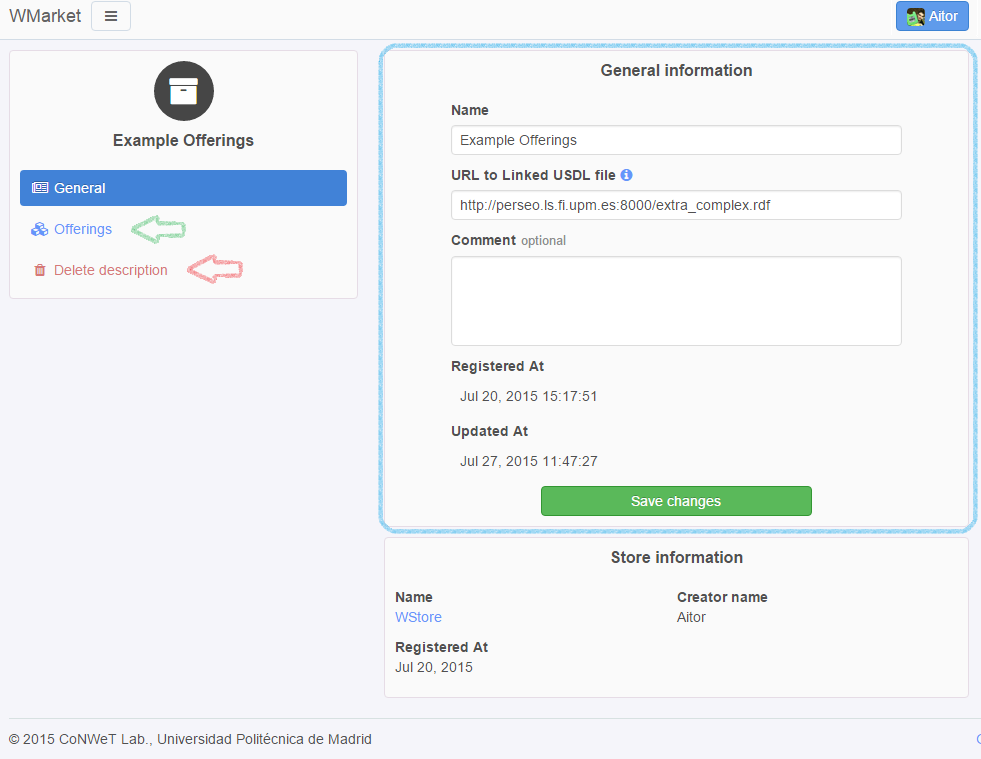
If you want to edit the description details, you can use the form contained in the blue rectangle. Once that you have finished editing the description, click the Save changes button.
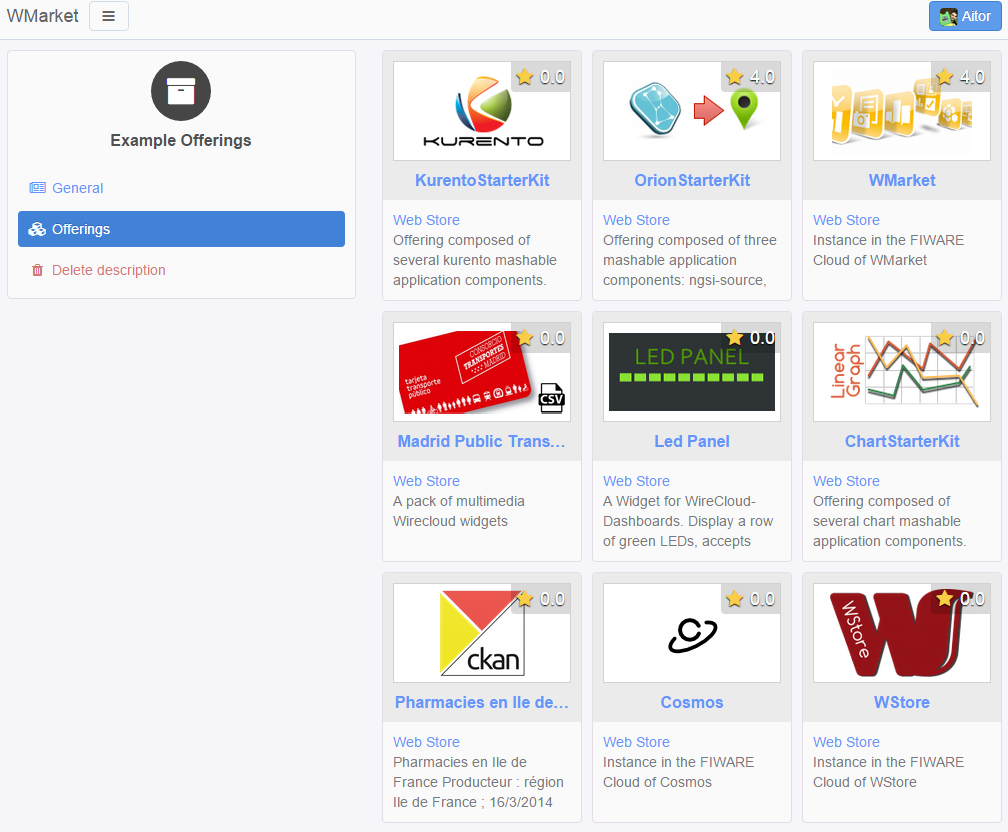
To view all the offerings contained in the offering, click the Offerings button (the one indicated by a green arrow). You will be displayed a screen similar to the following one:
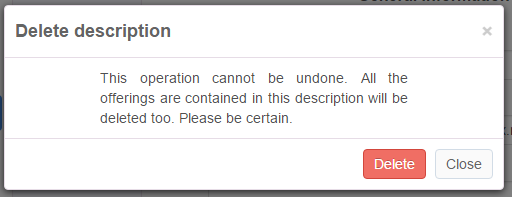
Finally, if you want to delete a description, just click the Delete description button. Before deleting the description, you will be required to confirm the action with a dialog similar to the following one:
Note
By deleting a description, you will delete all the attached offerings (and its reviews or statistics).
Note
Descriptions are periodically updated to check whether new offerings have been included.
Programmer Guide
API
If you are not a normal user but a programmer, you may be interested in using the API to interact with the Marketplace, so you can build your own apps based on it. You can check the API Reference at:
Please, note that all the requests against the Marketplace must be authenticated (except for the one to create users). Each instance can be configured to work with a different authentication system.
If the instance you are working with is using an external IdM, you must include the OAuth2 header to authenticate the user:
Authentication: Bearer OAUTH2_TOKEN
On the other hand, if the instance is using the local authentication system, you can use the Basic header to authenticate the user:
Authentication: Basic BASIC_TOKEN
where BASIC_TOKEN is a String that can be constructed as follows:
- Username and password are combined into a string
username:password. (ex:aitor:1234) - The resulting string is then encoded usign the RFC2045-MIME variant of Base64
(ex:
YWl0b3I6MTIzNA==)
Offerings Descriptions (Linked USDL)
As stated before, Linked USDL files are those files used to describe the offerings published in WMarket. One Linked USDL file can contain one or more offerings. These files are written in RDF.
WMarket is fully integrated with WStore so you do not have to worry about creating Linked USDL files to upload your offerings to WMarket since WStore will create and upload them for you.
However, in some cases you can be interested in uploading your offerings to WMarket without using WStore. To do so, you have just to create the Linked USDL file that describe your offerings. This tutorial will guide you in creating these files in a very easy way.
Note
All the examples given in the following sections are written using the XML representation of RDF.
Structure
The first thing that you have to do is to create the main node of the file to include all the vocabularies that will be used to describe the different offerings. So, your header should be similar to the following one:
<?xml version="1.0"?>
<rdf:RDF xmlns:rdf="http://www.w3.org/1999/02/22-rdf-syntax-ns#"
    xmlns:foaf="http://xmlns.com/foaf/0.1/"
    xmlns:rdfs="http://www.w3.org/2000/01/rdf-schema#"
    xmlns:dcterms="http://purl.org/dc/terms/"
    xmlns:usdl="http://www.linked-usdl.org/ns/usdl-core#"
    xmlns:pav="http://purl.org/pav/"
    xmlns:price="http://www.linked-usdl.org/ns/usdl-pricing#"
    xmlns:xsd="http://www.w3.org/2001/XMLSchema#"
    xmlns:skos="http://www.w3.org/2004/02/skos/core#"
    xmlns:gr="http://purl.org/goodrelations/v1#">

    ...

</rdf:RDF>
Service Offerings
Once that you have included all the required vocabularies, you are ready to
create the offerings. As stated before, a Linked USDL can contain one or more
offerings. Each offering is represented by a usdl:ServiceOffering as
follows:
<usdl:ServiceOffering xmlns:rdf="http://www.w3.org/1999/02/22-rdf-syntax-ns#" rdf:about="http://repo.fiware/inputboxwidget">
    <dcterms:title xml:lang="en">Input Box Widget</dcterms:title>
    <dcterms:description xml:lang="en">A simple widget with an input box.</dcterms:description>
    <pav:version>1.0</pav:version>
    <foaf:depiction rdf:resource="https://store.lab.fiware.org/media/CoNWeT__InputBoxWidget__1.0/catalogue.png" />
    <gr:availableDeliveryMethods rdf:resource="http://store.lab.fiware.org/offering/user/inputboxwidget/1.0"/>
</usdl:ServiceOffering>
For each offering, you are required to include at least the following tags:
dcterms:title: The title of your offeringdcters:description: A brief description for your offeringpav:version: The version of your offeringfoaf:depiction: The URL of the image that identifies your offering. This image will be displayed in the GUIgr:availableDeliveryMethods: The URL where consumer must be redirected to acquire the offering
However, this information can be not enough for WMarket consumers. For this reason you can also include extra nodes to specify the price plans and the services included in your offering.
Price Plans
One Offering (usdl:ServiceOffering) can contain zero or more price plans.
To include one price plan in your offering, just add the price plan tag
(usdl:hasPricePlan) to your usdl:ServiceOffering as follow:
<usdl:ServiceOffering xmlns:rdf="http://www.w3.org/1999/02/22-rdf-syntax-ns#" rdf:about="http://repo.fiware/inputboxwidget">
  ...
  <usdl:hasPricePlan rdf:nodeID="priceplan1"/>
</usdl:ServiceOffering>
As can be seen, the node refers to the specific price plan included in the
offering. Each price plan is a node (price:PricePlan) that must be embedded
in the same file and should look similar to the following one:
<price:PricePlan xmlns:rdf="http://www.w3.org/1999/02/22-rdf-syntax-ns#" rdf:nodeID="priceplan1">
    <dcterms:title xml:lang="en">Single Payment</dcterms:title>
    <dcterms:description xml:lang="en">This offering needs a single payment to be acquired</dcterms:description>
    <price:hasPriceComponent rdf:nodeID="pricecomponent1"/>
</price:PricePlan>
Price Plans (price:PricePlan) include zero (for free offerings) or more
Price Components tagged as price:hasPriceComponent. As with Price Plans,
these Price Components are nodes (price:PriceComponent) which must be
embedded in the same file and follow this structure:
<price:PriceComponent rdf:nodeID="pricecomponent1">
    <rdfs:label xml:lang="en">Single payment</rdfs:label>
    <dcterms:description xml:lang="en">This component defines a single payment</dcterms:description>
    <price:hasPrice rdf:nodeID="pricespec1"/>
</price:PriceComponent>

<gr:PriceSpecification rdf:nodeID="pricespec1">
    <gr:hasCurrencyValue>1.0</gr:hasCurrencyValue>
    <gr:hasUnitOfMeasurement>single payment</gr:hasUnitOfMeasurement>
    <gr:hasCurrency>EUR</gr:hasCurrency>
</gr:PriceSpecification>
The name and description of the Price Component can be set in the
price:PriceComponent node while the pricing details (currency, units and
value) must be set in a separate node with type gr:PriceSpecification as
stated in the given example. A Price Component must contain just one Price
Specification.
Services
An Offering (usdl:ServiceOffering) can also contain zero or more services.
Services are the products (APIs, widgets, datasets, files, etc.) that you attach
to the offering. To include one service in your offering, just add the service
tag (usdl:includes) to your usdl:ServiceOffering as follow:
<usdl:ServiceOffering xmlns:rdf="http://www.w3.org/1999/02/22-rdf-syntax-ns#" rdf:about="http://repo.fiware/inputboxwidget">
    ...
    <usdl:includes rdf:resource="http://repo.fiware/inputboxwidget#service1"/>
</usdl:ServiceOffering>
The node refers to the specific service included in the offering. Each service
is a node (usdl:Service) that must be embedded in the same file. It will be
similar to the following one:
<usdl:Service xmlns:rdf="http://www.w3.org/1999/02/22-rdf-syntax-ns#" rdf:about="http://repo.fiware/inputboxwidget#service1">
    <dcterms:title xml:lang="en">Input Box Widget</dcterms:title>
    <dcterms:description xml:lang="en">A widget with a simple input box that can be use to request data</dcterms:description>
    <usdl:hasClassification rdf:nodeID="classification1" />
</usdl:Service>
As can be seen, we can set the name and the description of the service.
Additionally, we can also specify a set of categories that can be used to
categorize and identify the service easily. To to it, just add the node
usdl:hasClassification that will refer to a category (skos:Concept)
embedded in the same file. Use the node rdfs:label to set the name of the
category.
<skos:Concept xmlns:rdf="http://www.w3.org/1999/02/22-rdf-syntax-ns#" rdf:nodeID="classification1">
    <rdfs:label>Wirecloud widget</rdfs:label>
</skos:Concept>
Note
Offerings are categorized based on the categories of their services.
Example
You can find the previous example
here. This example is very
simple. Please, keep in mind that:
- A description file can contain more than one offering
- An offering can contain more than one price plan
- A price plan can contain more than one price component
- An offering can contain more than one service
- More than one category can be attached to a service